Creating a New Document in Finale
This time we're going to show you how to create a new document in Finale, the most popular software for writing and editing sheet music.
If you're a musician and you want to start building a solid level across every aspect of music, then you need to learn how to use Finale.
So let's not wait any longer and get started with a new document in Finale.
Launching Finale
To create a new document in Finale, the first thing you need to do is download the software so you can install it on your computer.
You can start the download from our guide on how to Download Finale, the sheet music editor, where you'll find every step to get it installed on your desktop or laptop.
Once you've downloaded and installed the program, it's time to launch Finale.
Choosing the Finale Setup Wizard
After launching the program, a window will open where you can create your new document in Finale.
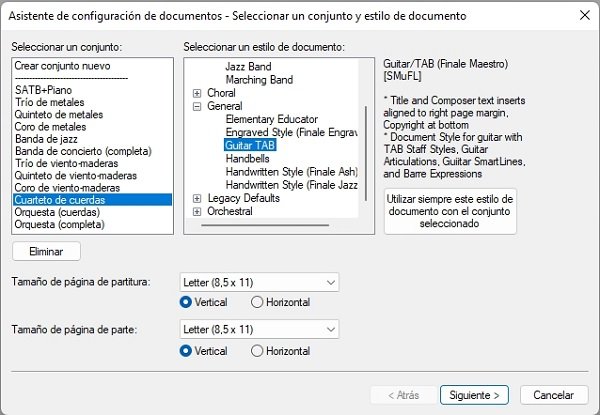
You'll have several options under “Select an Ensemble” and “Select a Document Style.” At this point you won't select any ensemble, but you will choose “General” and “Guitar TAB,” then click “Next” so the staff is created.
That said, this staff may be created in treble clef due to a Finale glitch, but you can change it to bass clef afterward.
Choosing an Instrument
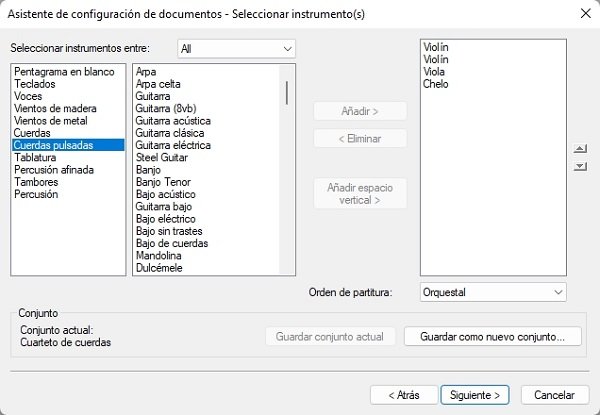
When you click “Next,” you can select the instrument. To do this, click “Plucked Strings” and several instrument options will appear.
At this point you select “Electric Bass” and click the “Add” button so the instrument is added, then click the “Next” button.
Document Information
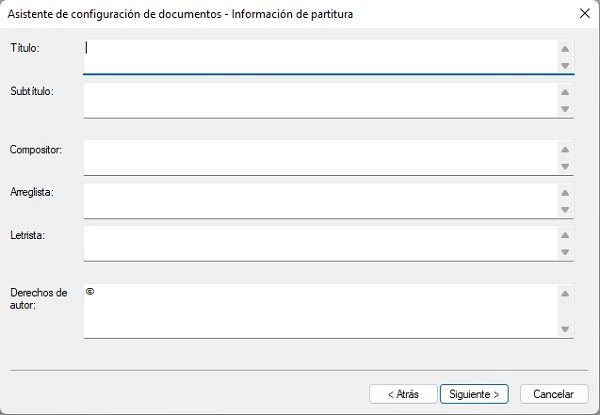
In this window for creating a new document in Finale, you'll need to enter the score's information: 1. Title, 2. Subtitle, 3. Composer, 4. Arranger, 5. Lyricist, and 6. Copyright.
Now click “Next” to continue with the setup.
Setting the Time Signature and Key Signature
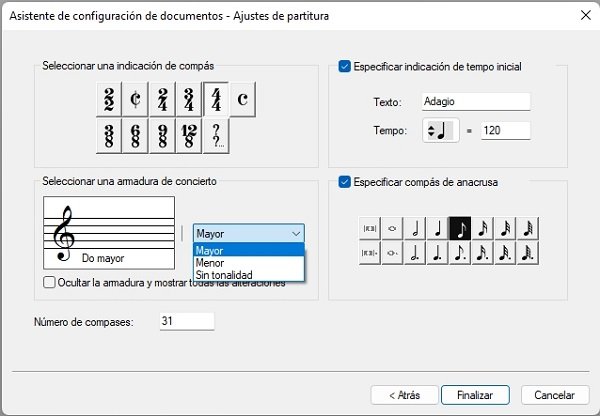
In this next window you'll need to set the time signature, choose between a major and minor key, set the tempo, the beats per minute, and decide whether you want a pickup measure.
At the bottom of the options you can choose how many measures you want. Our recommendation is to leave the default of 31 and later modify it to add as many measures as you need.
A Few Details Finale Doesn't Fix on Its Own
Like any software, Finale isn't free of bugs, which is why you may run into a few details that don't get fixed automatically in your new Finale document.
During our testing, the document was sometimes created in treble clef even though we had selected the bass instrument. Other times, the document was created in bass clef.
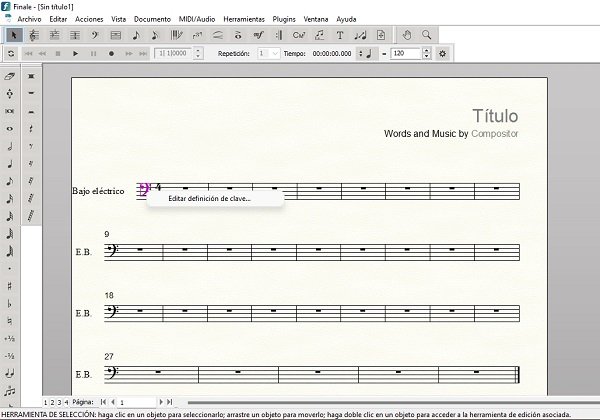
If your document ends up in treble clef, you can fix it by selecting the pointer in the toolbar.
With the pointer selected, click the “Treble Clef” on the staff and right-click to find the “Clef Definition” option.
When you click “Clef Definition,” a window opens that gives you all the available clef options, along with other configuration settings.
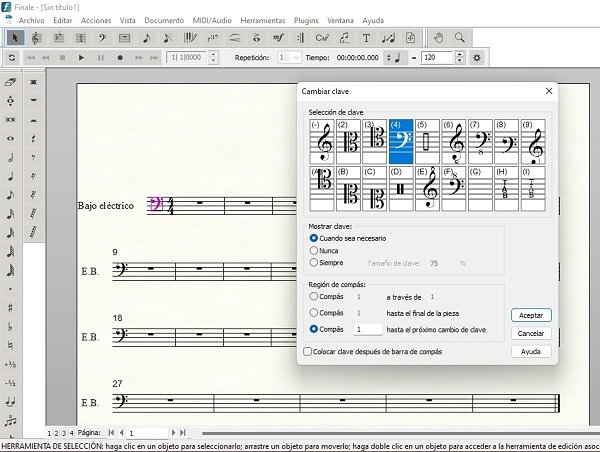
From there, you select the bass clef and confirm your choice.
The Finale Interface
Creating a new document in Finale isn't enough; you also need to get familiar with the interface, which is split into three toolbars.
- Top toolbar: you'll find File, Edit, Utilities, View, Document, MIDI/Audio, Tools, Plug-ins, Window, and Help.
- Side toolbars: these are two toolbars that hold all the options for musical notes and symbols.

In upcoming posts we'll bring you plenty of guides to help you master this sheet music editing software.
For now, download the software from our guide and then create your very first new document in Finale.